Extra Fields
This optional feature gives you the ability to record additional data into WMI through the WIR Interface. For instance, you can add fields concerning departments, purchase orders, locations, etc., by either manually recording this data, or by using the script at the end of this section to pre-populate the fields with your data.
The first method is to edit the fields directly in the interface and click Save in the main tab to populate WMI.
From the WIR Interface, connect to a PC by using the Connect button.
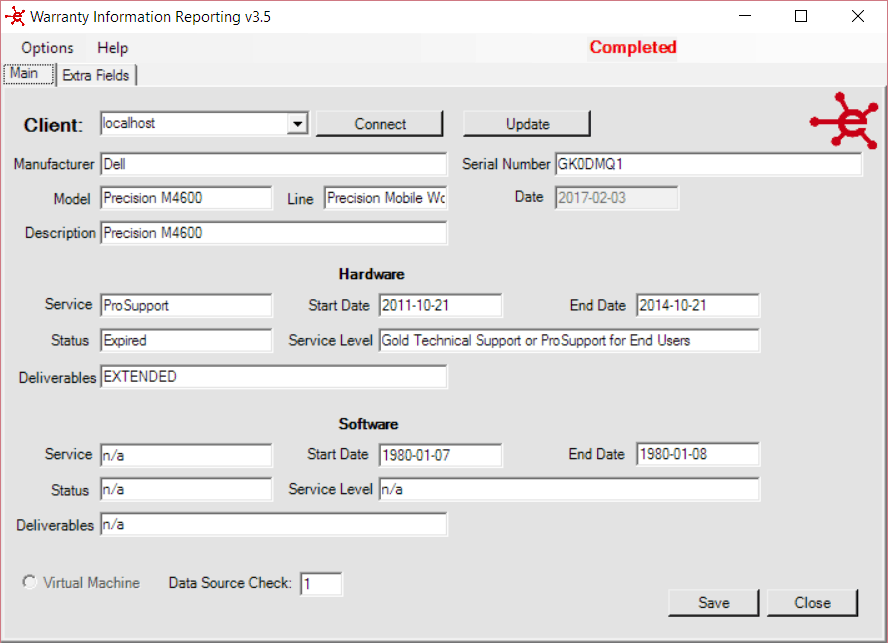
Next, click on the Extra Fields tab
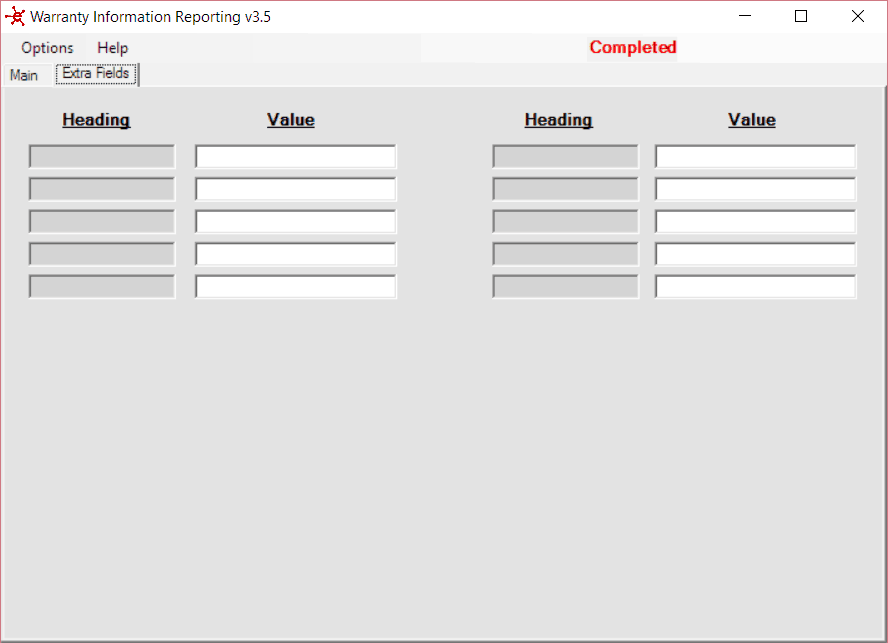
Edit the fields in the interface, then return to the Main tab and click on the Save button. The newly added data will be stored within WMI. Empty Extra Fields are shown in the above screenshot.
In the example below, 7 of the 10 Extra Fields are populated.

The second method that you can use to populate WMI through the WIR Interface is to edit the configuration file. This method can also be used to pre-populate headings, so that the information being added to the interface is consistent.
When WIR is executed the Extra Fields information is read from the configuration file and populates the interface.
Note: Since WIR is installed under program files by default, you might need to execute the text editor with elevated permissions in order to save the configuration file.
Extra Fields section from the configuration file:
<appSettings>
<add key=”LicenseKey” value=” “/>
<add key=”CompanyName” value=” “/>
<add key =”ProxyUser” value =””/>
<add key =”ProxyPassword” value =””/>
<add key =”ProxyURL” value =””/>
<add key =”Heading1″ value =” PO #”/>
<add key =”Heading2″ value =”Department”/>
<add key =”Heading3″ value =”Manager”/>
<add key =”Heading4″ value =”Telephone”/>
<add key =”Heading5″ value =” Asset Tag”/>
<add key =”Heading6″ value =””/>
<add key =”Heading7″ value =””/>
<add key =”Heading8″ value =””/>
<add key =”Heading9″ value =””/>
<add key =”Heading10″ value =””/>
<add key =”Field1″ value =”ES_100217″/>
<add key =”Field2″ value =”Finance”/>
<add key =”Field3″ value =”n/a”/>
<add key =”Field4″ value =”613-627-4801″/>
<add key =”Field5″ value =”ES100267″/>
<add key =”Field6″ value =””/>
<add key =”Field7″ value =””/>
<add key =”Field8″ value =””/>
<add key =”Field9″ value =””/>
<add key =”Field10″ value =””/>
</appSettings>